
Before we can configure the agent we must have it configured in the Zabbix dashboard first. Log into the web GUI with the credentials provided by your Tech Manager if authorized to do so. Navigate to Configuration < Hosts. Here you will find all the Hosts that have been added so far. To add one, it is easiest to clone an existing OpenWRT host. At this moment OpenWRTTestRouter is active and will be used for this example.
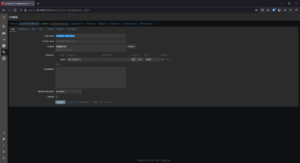
Once we click on the host, we can there are some buttons at the bottom, one of which is “Clone”. If we click on it, the page will reload and the same information will be kept on it but we just need to alter it for our new host. Choose a Hostname (this will need to be exactly the same in the configuration file of the Zabbix agent), we recommend using “[Site Acronym]-Router”. The IP address needs to be the local IP address of the router. The proxy will need to be the proxy for the site. The templates tab contains templates specific to OpenWRT, and by cloning this existing router we didn’t need to make the tedious effort of finding them and making sure we have the right ones. Go to the “Tags” tab. “Loc” represents the location, so under value just fill it with the acronym of the site again. If there are multiple locations make sure to specify with something like “SpecialHospital-Stockbridge”. Hit “Update” and proceed on to the next part of the SOP.